
3D Printing & Scanning |
||||
| Introduction :: | ||||
A method of manufacturing known as ‘Additive manufacturing’, due to the fact that instead of removing material to create a part, the process adds material in successive patterns to create the desired shape. |
||||
3D Printing uses software that slices the 3D model into layers (0.01mm thick or less in most cases). Each layer is then traced onto the build plate by the printer, once the pattern is completed, the build plate is lowered and the next layer is added on top of the previous one. |
||||
|
3D printing or additive manufacturing is a process of making three dimensional solid objects from a digital file. The creation of a 3D printed object is achieved using additive processes. In an additive process an object is created by laying down successive layers of material until the object is created. Each of these layers can be seen as a thinly sliced cross-section of the object. 3D printing is the opposite of subtractive manufacturing which is cutting out / hollowing out a piece of metal or plastic with for instance a milling machine. 3D printing enables you to produce complex shapes using less material than traditional manufacturing methods.
|
||||
Learning Outcomes: |
||||
To understand the working of 3D Printers. To know about different filament material used for 3d printing. To understand the design rules of the 3D Printer. To understand the print settings. To understand 3D Scanning. |
||||
Technical Specifications, Model, Materials, Softwares etc: |
||||
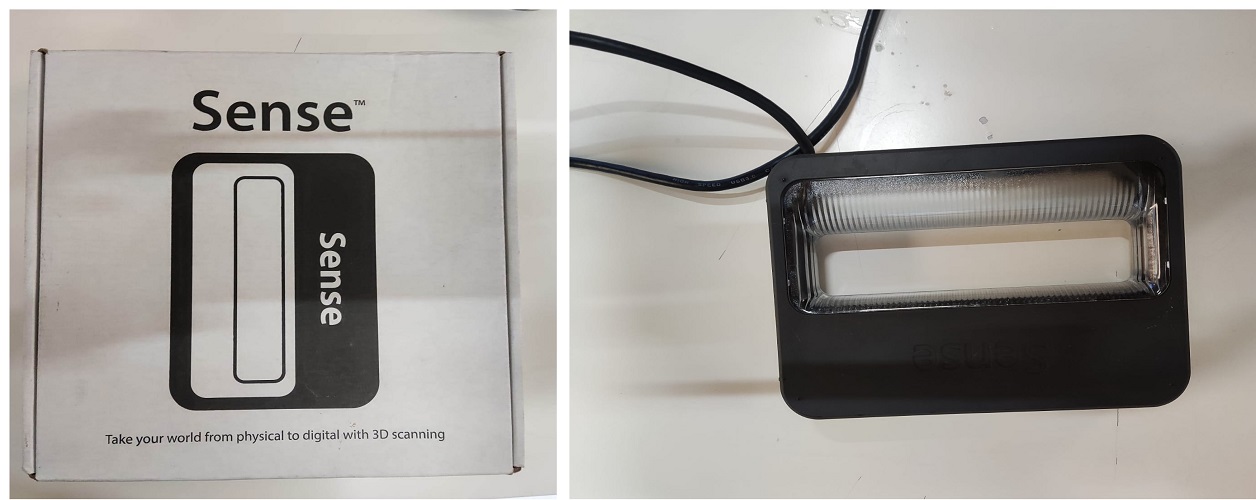
In our FabLab, STPI-Bhubaneswar, we have Sindoh DP 200 Printer, which is an additive models and then I scanned some things by some scanning tools: 3D SENSE. |
||||
1.Technology: Fused filament fabrication (FFF) 2.Type: Material extrusion 3.Year: 2017 4.Manufacturer: Sindoh 5.Manufacturer country: South Korea Materials:1.Filameter diameter: : 1.75 mm 2.Printable materials : ABS, PLA, PVA,PETG Build volume:1.3D print size : Medium 2.Print size millimeters (xyz) : 228 x 200 x 300 mm 3.Print size inches (xyz): 8.9 x 7.9 x 11.8 inches 3D printer and printing properties1.Layer height : 20 – 200 Microns 2.Nozzle size: : 0.4 mm 3.Closed print chamber : Yes, fully enclosed 4.Connectivity : Ethernet, USB cable, Wi-Fi Requirements1.Software : 3DWOX 2.Operating system(s) : Windows |
||||
This week's assignment was |
||||
| 1) to design and 3D print an object (a small, few cm3, with limited printing time) |
||||
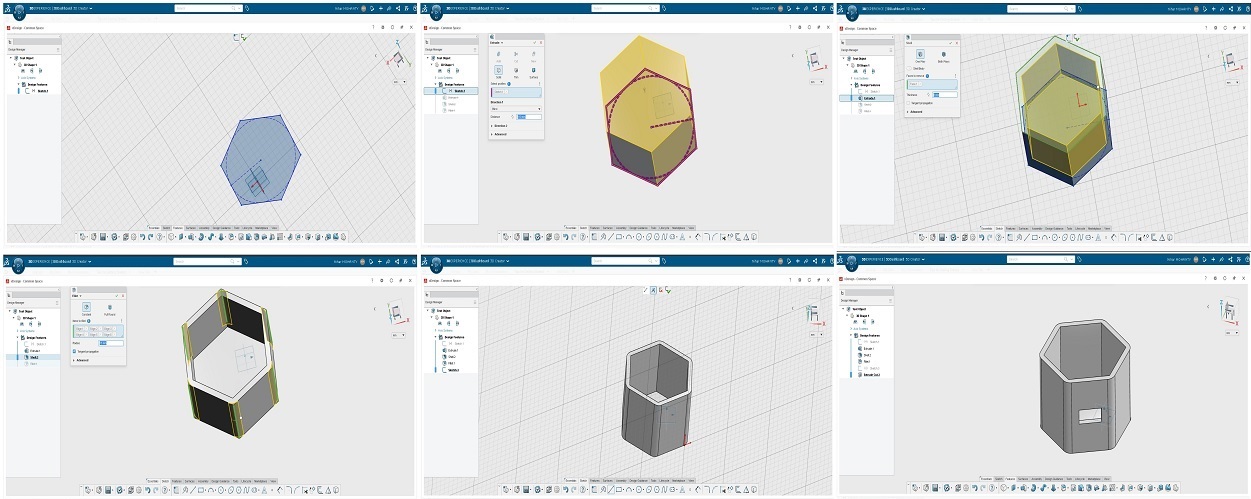
The Design: |
||||
 |
||||
 |
||||
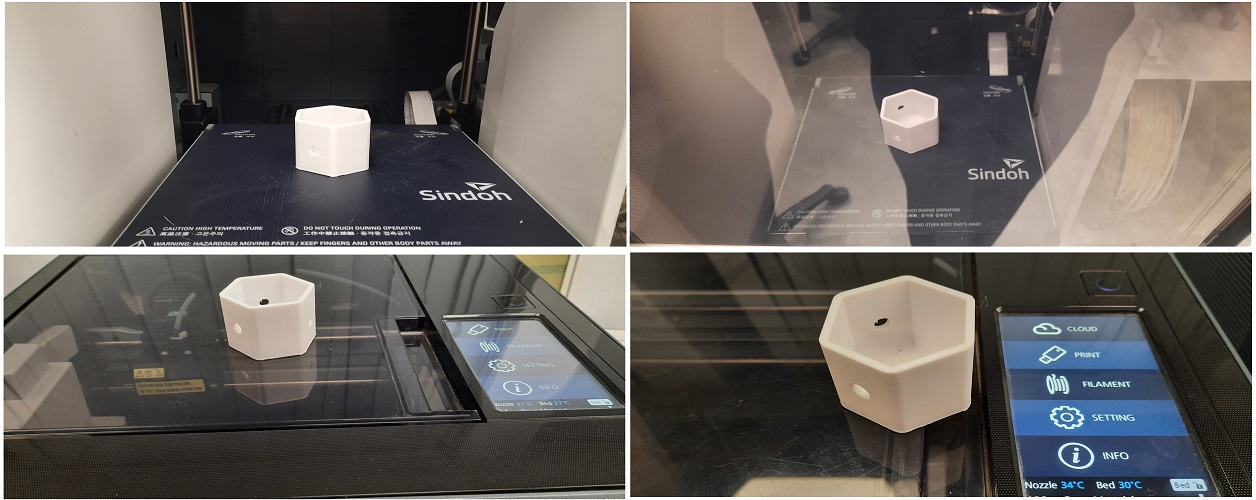
For Printing of the designed object in Sindoh 3D WOX (DP 200) |
||||
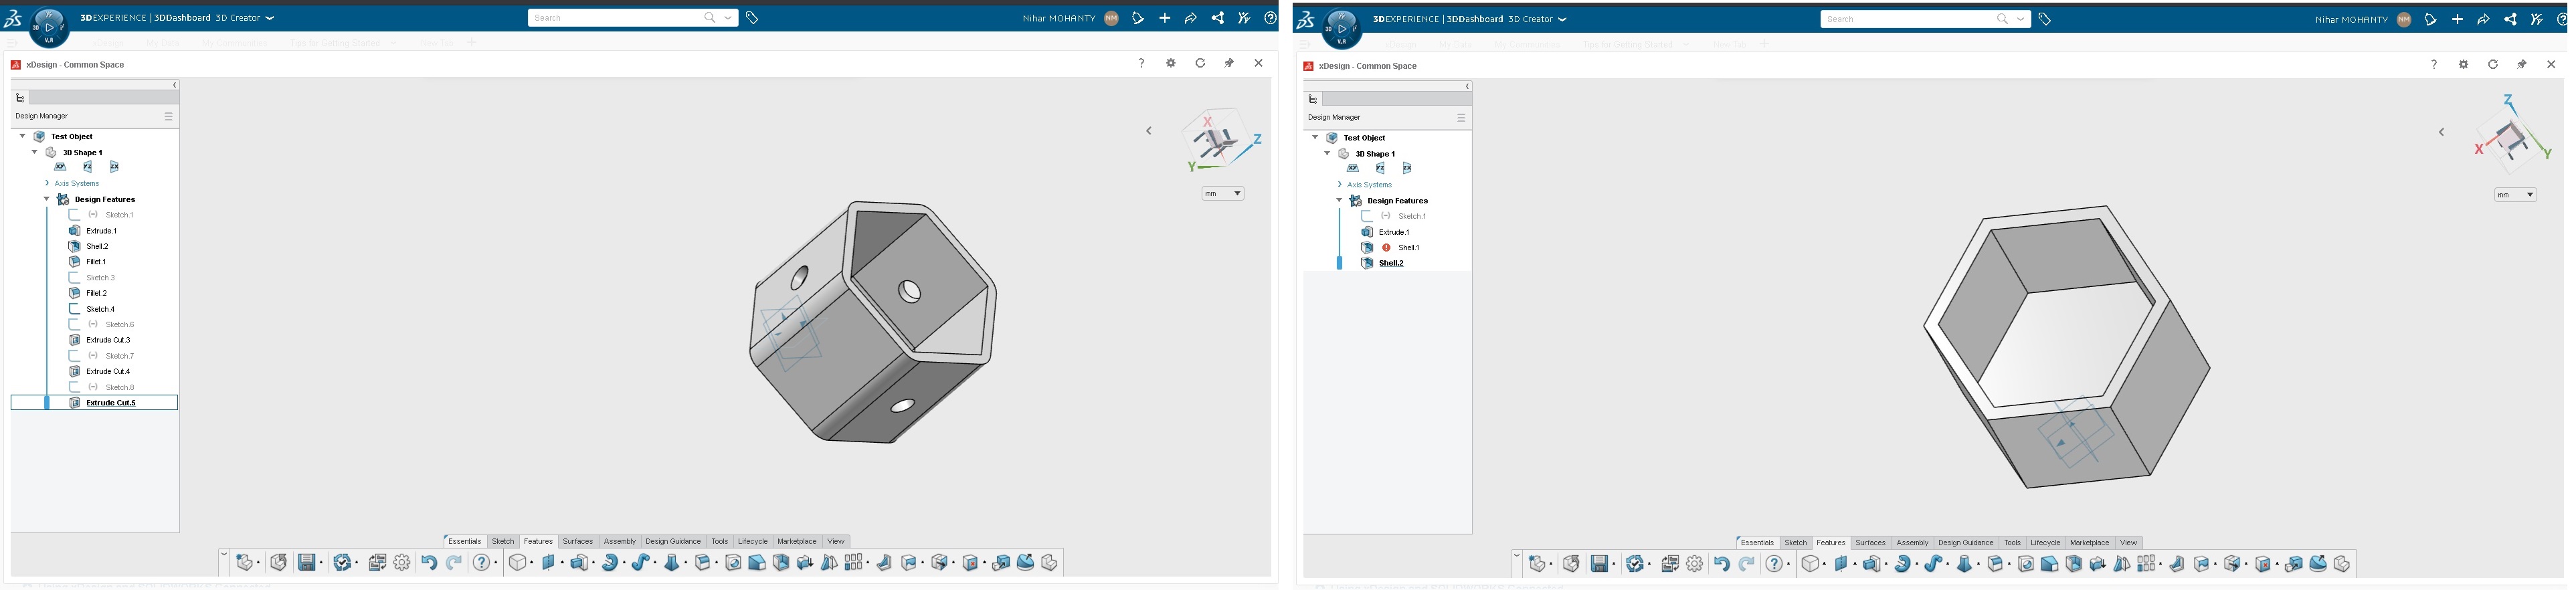
After completing the design, I saved it as .stl format and then uploaded in software of 3D printer. After uploading the image, there are various option of increasing and decreasing the dimensions, orientation of print etc. I decreased the size of my design so that the printer may print it quickly and less material is used. Further I saw the formation of the base and the layers in my design and then calculated it for savin it in G-Code. G-Code is the language by which the printer understands the inputs and converts the inputs into a desired output. The images of my work in 3DWOX software images are shown below:- |
||||
 |
||||
3D Scanning & Printing |
||||
The 3D laser scanning technology has been reached by more and more users in the last years, thanks to a new market of low cost devices, more affordable for simple, non-professional use. The educational use is one of such environments, and its didactics purposes gives the opportunity to test new technology from a variety of different point of views. The characterization performed gave the opportunity to students to test how such devices work, the output reliability, which are the inherent issues and what kind of strategies should be introduced to enhance the scanning quality. |
||||
I learned 3D scanning using the Sense 3D Scanner. Since we have the Sense 3D scanner, we took places in scanning each other. |
||||
Specifications |
||||
Minimum scan volume: 0.2m x 0.2m x 0.2m. |
||||
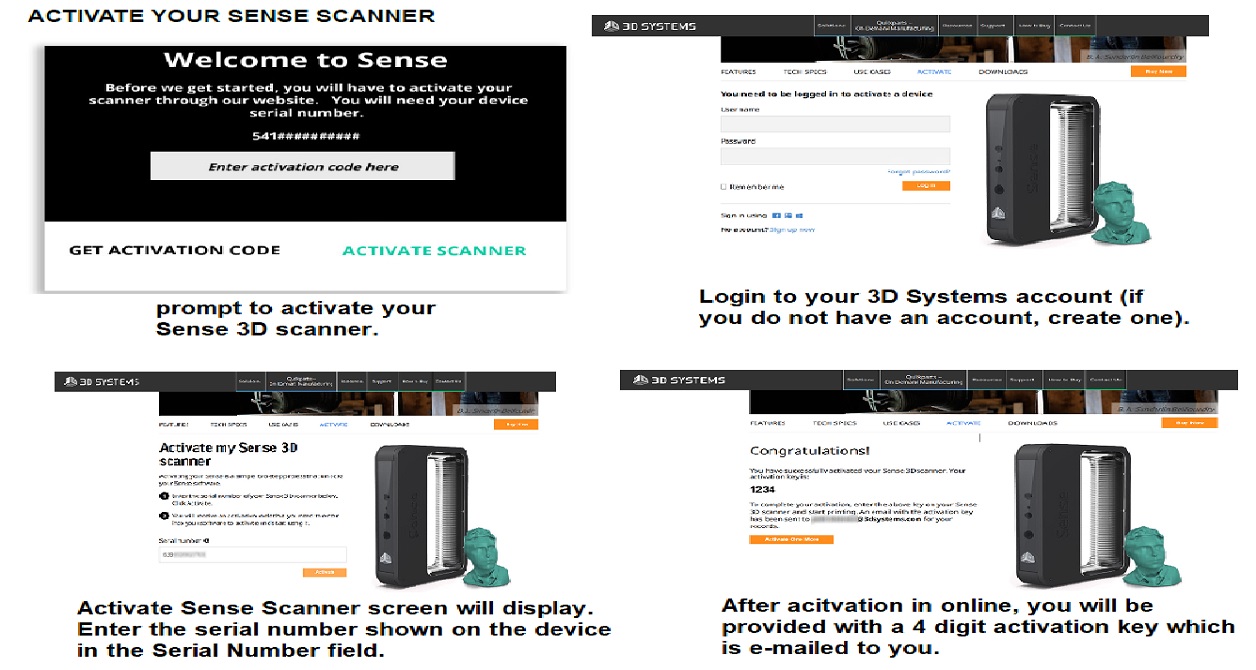
Steps for installing the Sense 3D software1. I downloaded software from Customer Support Center page: Customer Support Center page. Troubleshoot:If the scanner is not connected to your computer, a message will state "Device not connected." Plug the USB connector for the scanner into the USB 3.0 port on your computer and it will be prompted to activate your Sense 3D scanner. |
||||
|
||||
 |
||||
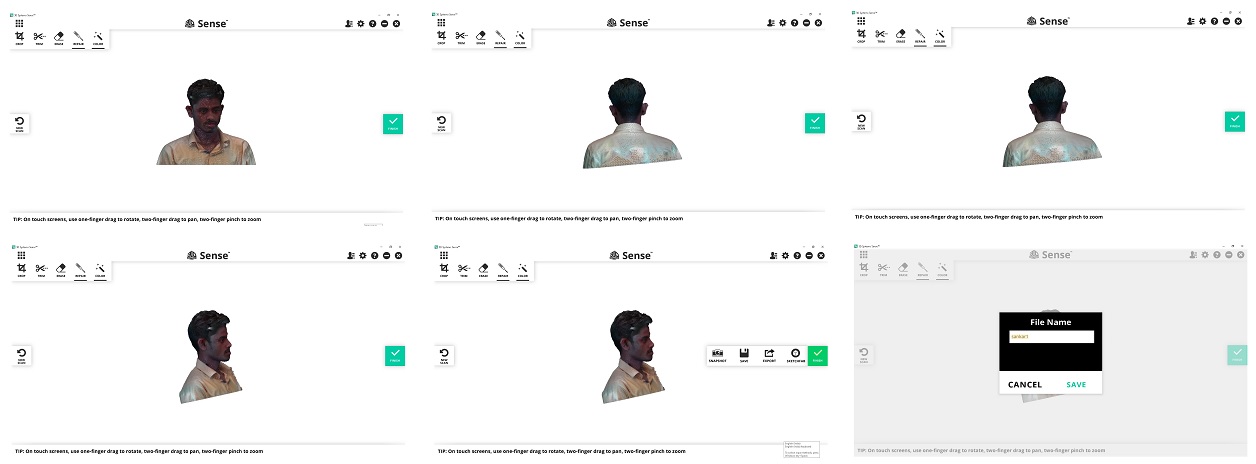
After installing and activating the Sense software, I opened the application and started scanning of the object. I tried the scanner to scan of my colleague in the Sense 3D Scan. |
||||
 |
||||
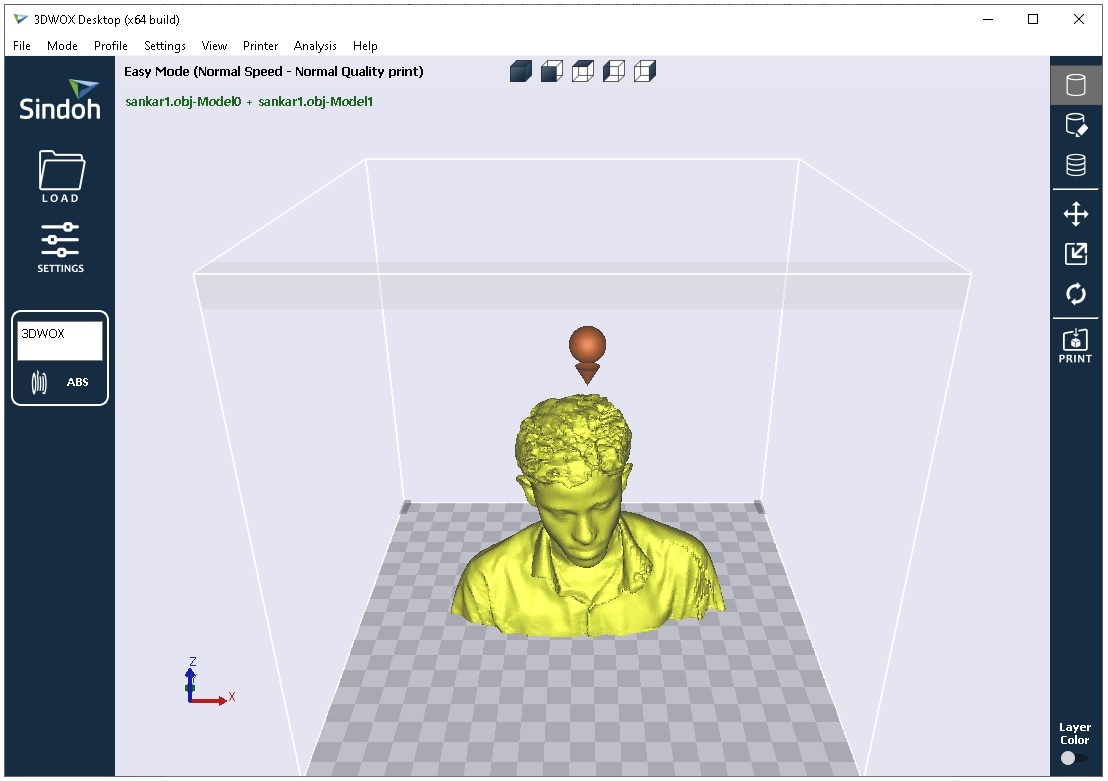
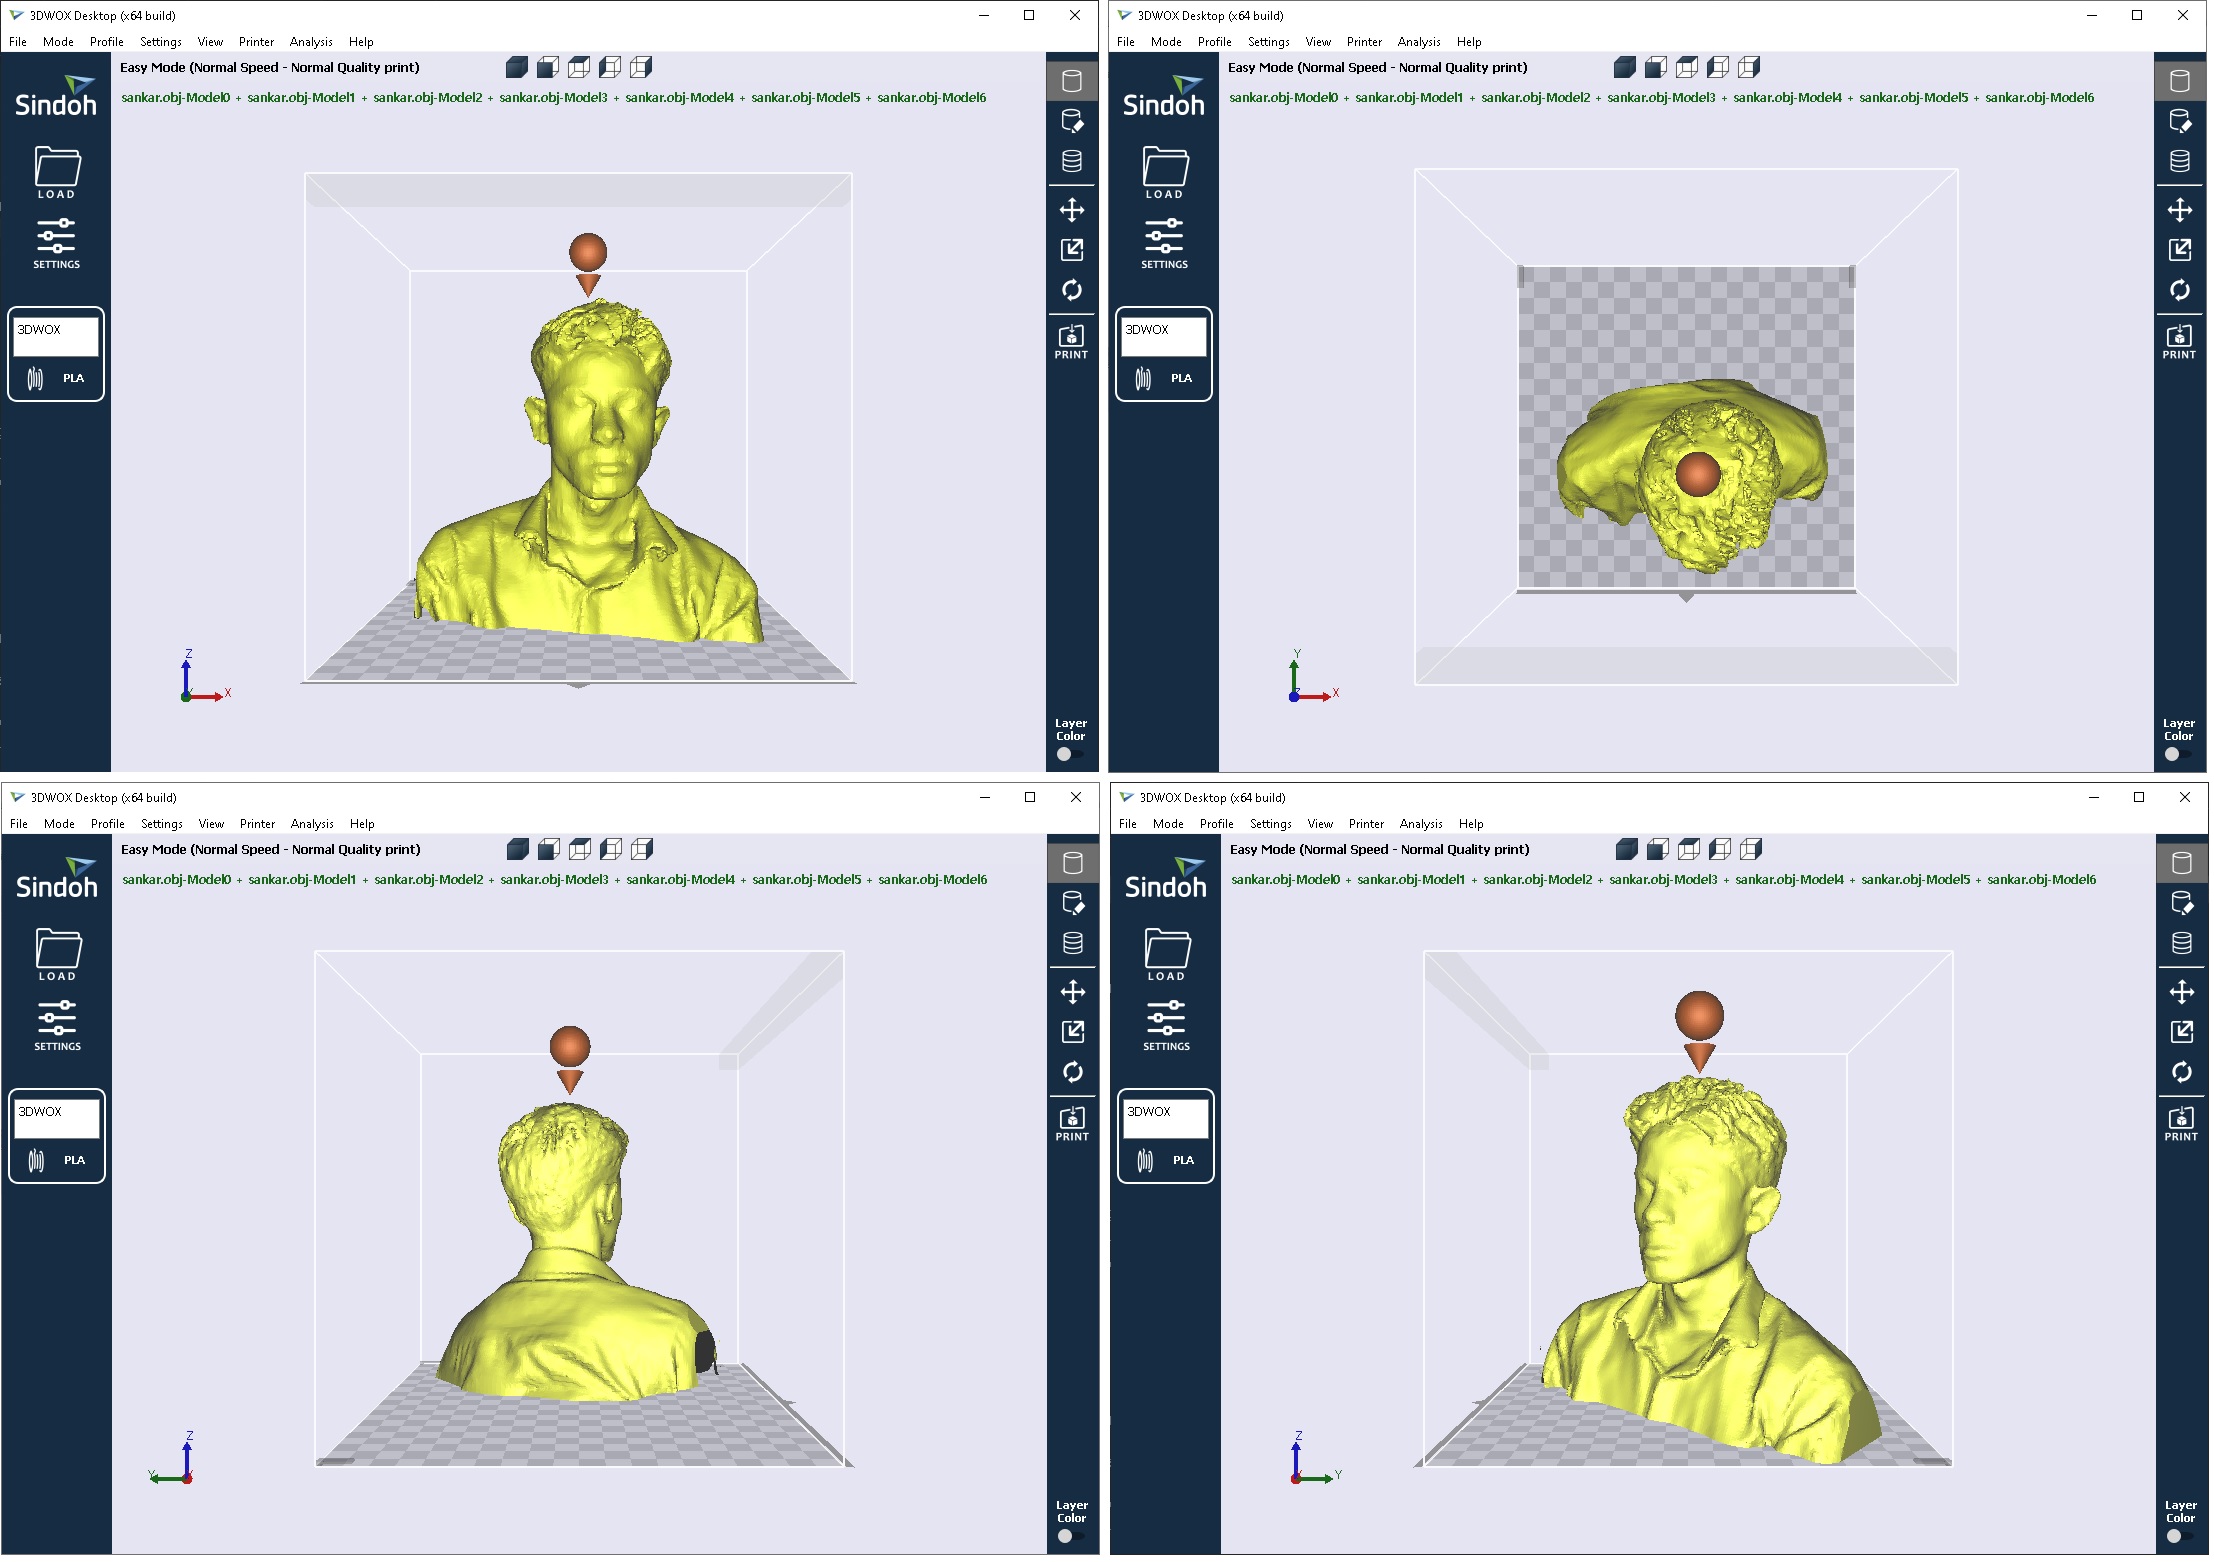
After scanning, I saved the file with an extension .STL. After that, I redesigned the image like trimming and solidifying the hole area, cutting etc., so that the print will come out in a proper shape and complete. After finishing the redesign, I put the file for final printing. I opened the 3D WOX software, which a printer menu of Sindoh 3d WOX (DP 200 Printer) and loaded the saved model. After loading, i checked all the parameters and moed for printing. |
||||
 |
||||
 |
||||
The limitation of the the 3D printer |
||||
| 1)Surface texture is generally too rough. |
||||
Download Files |
||||
 |
||||